Calibration Services 
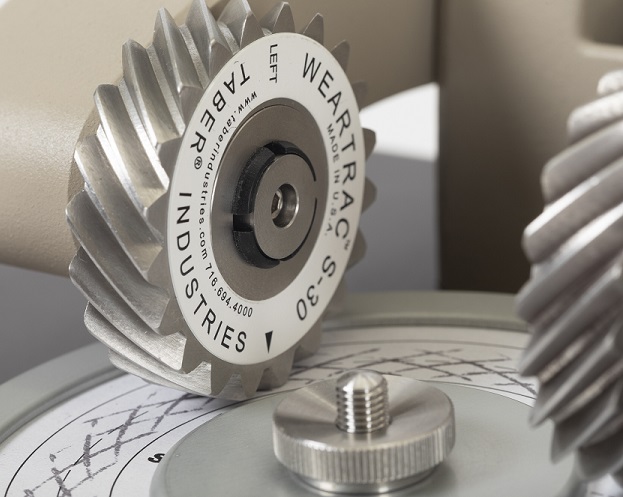
The Taber® Rotary Platform Abraser (Abrader) is a precision instrument that must be calibrated by an authorized Taber Calibration Center on a regular basis. The frequency of this calibration should be based on instrument usage, experience, and good laboratory practice and become incorporated into your company's quality procedures.
Authorized Taber Calibration
Taber Industries calibration service for the Rotary Platform Abraser (Abrader) incorporates a proprietary gauging system used to measure critical parameters. Our skilled technicians evaluate the instrument against established tolerances and make the necessary adjustments to ensure that each unit is set to the required specifications. If any problems are identified during this evaluation, the customer is notified prior to the repair.
Taber Industries provides calibration support to qualified authorized distributors outside of the United States. However, we do not support any independent third-party calibration services that claim to be qualified to calibrate Taber instruments. If you are considering the use of an outside service to calibrate your instrument, we strongly suggest confirming what parameters are examined and to what tolerances.
Calibration Verification Kit
A Calibration Verification Kit is available for the Taber Rotary Platform Abraser. While not intended as a substitute for regular instrument calibration, this reliable system check is useful to identify potential concerns and will signify if an instrument should be returned for recalibration or repair prior to its scheduled calibration.
The kit includes instructions to perform inspections critical to the performance of the instrument, and allows the operator to monitor the following vital parameters:
-
Proper wheel alignment
-
Proper wheel tracking
-
Irregular bearing wear
-
Vacuum suction force
Why is Calibration important?
Despite the appearance of a simplistic test, the Taber Abraser (Abrader) involves a complex interaction of each critical component. An out of tolerance condition of one element can lead to significant differences in test results. For example, improper alignment of the abrasive wheels can lead to each wheel abrading a different path from its complementary wheel across the sample as well as the wheels on other machines. Path surface area can differ by as much as 20% and the area abraded by both wheels on a sample could be less than 50% of the total abraded area for that sample!
Examples of a few potential sources of error have been identified below.
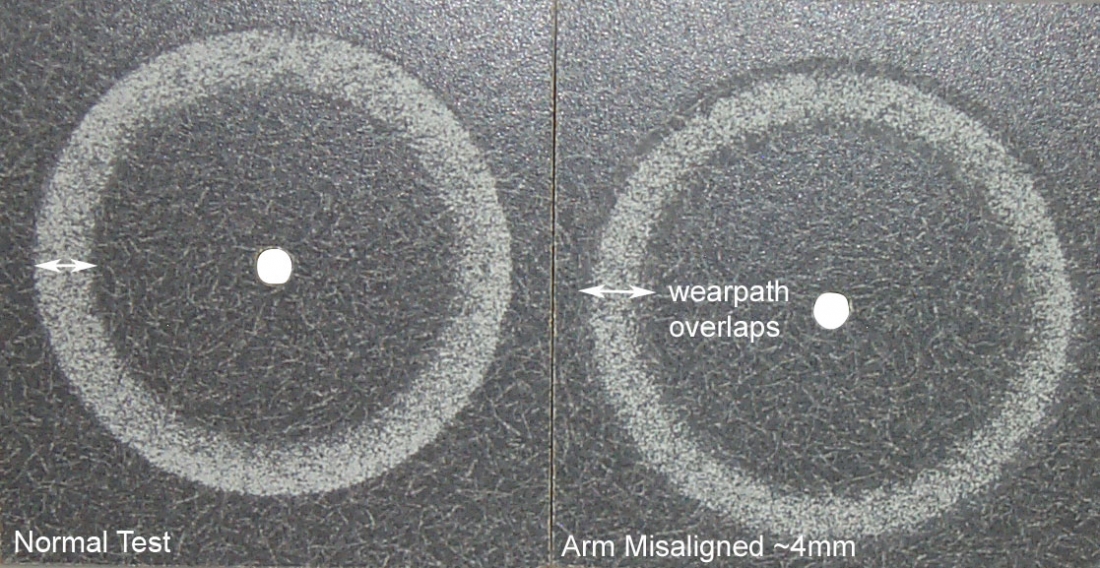
An abraser arm that is misaligned creates a wheel alignment issue as mentioned above. The impact of a 4mm misalignment include a change in wear area of approximately 1000 sq. mm, and a less aggressive test. Wheel overlap would be reduced from 100% to approximately 65%. The image to the right demonstrates laminate countertop material tested with an instrument exhibiting this condition.
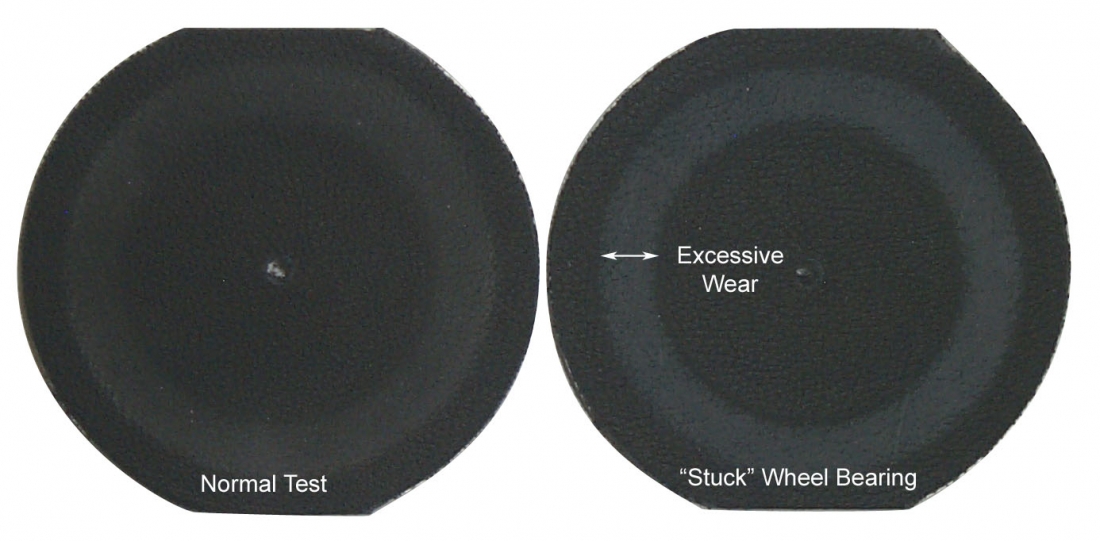
Wheel bearing rotation plays a critical role in the proper operation of the Taber Abraser (Abrader). Worn wheel bearings may have excessive play or inhibit easy wheel rotation. Specific areas to examine for bearing wear are the pivot areas of the abrader arm and the shaft on which the wheel revolves. This includes but is not limited to any sideways, twisting, or other motion outside the specific rotation of the arm or the shaft. As shown by the leather specimen image, a "stuck" bearing resulted in a more aggressive test which, depending on the product, may have lead to premature failure and possible rejection.
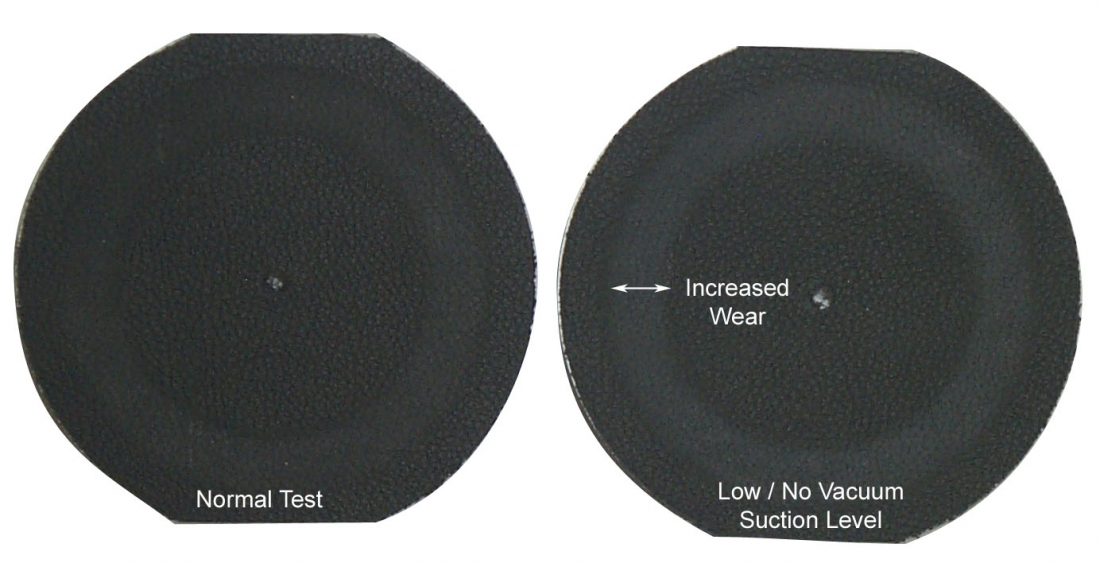
A properly working Taber vacuum system is necessary to remove debris from the specimen surface that is generated during the wear test (including proper vacuum nozzle height and vacuum suction level). With no vacuum, debris can build up on the specimen potentially changing the type of wear from 2-body to 3-body. For some materials, such as leather, this debris may form a protective barrier which reduces the amount of abrasion caused by the wheels. For other samples, like coated plastics, debris buildup results in a more aggressive test leading to higher than normal haze value. The image to the right demonstrates this phenomenon on a leather specimen.
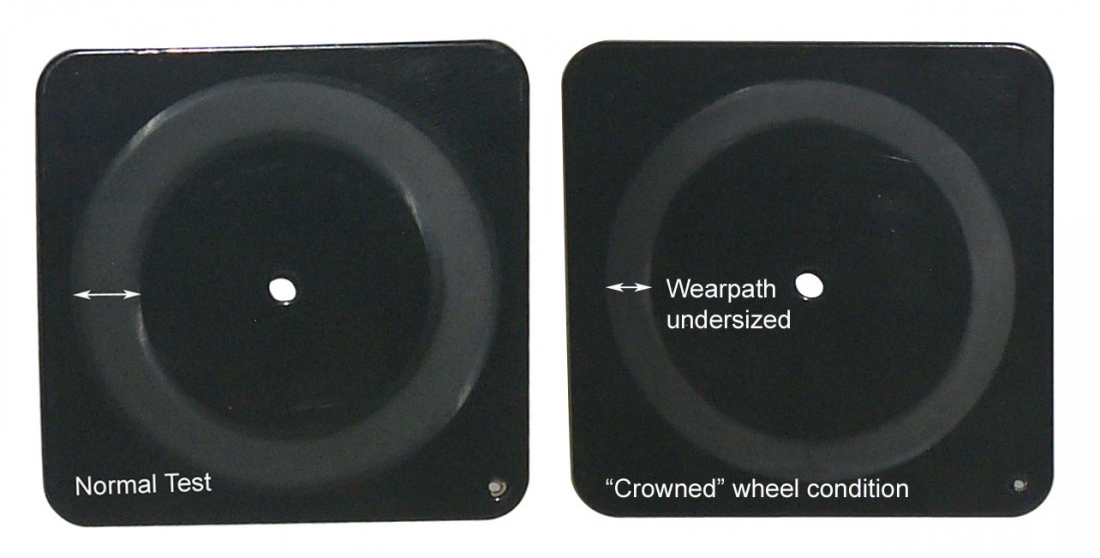
Testing with wheels that are rounded or crowned, may result in significant deviations from expected results. Crowned wheels increase the pressure at the sample interface due to the reduced contact area of the wheel. As a result, samples may show an early failure along with an undersized wearpath. One of the coated test panels on the right was tested using CS-10 wheels exhibiting a 'crowned' condition.
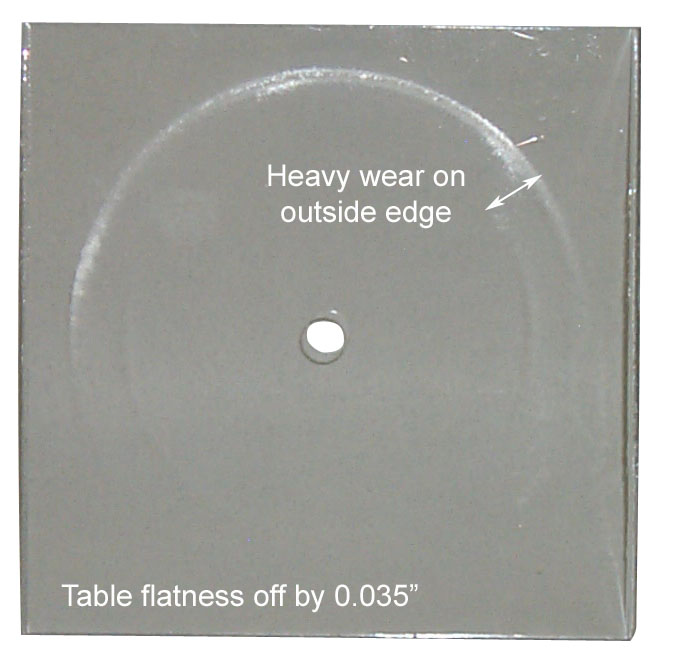
Table runout issues, typically noticed as a table wobble, can result in improper wear as the wheel contact area changes during the table rotation. In the case of a transparent coated plastic, a heavy wear pattern has developed on the outer edge of the sample as a result of table runout being off by 0.035".
The abraser arm provides a standard load of 250 +/- 1 gram on the wheel. Using the auxiliary weights, standard wheel loads of 500 or 1000 grams can be obtained. Please note, the markings on the auxiliary weights are NOT reflective of the actual mass of the additional weight. The auxiliary weights are marked with the TOTAL load that will be exerted on the wheel and equals the combined mass of the abraser arm and auxiliary weights. The weight marked 500 gram is 250 +/- 1 gram and the weight marked 1000 gram is 750 +/- 1 gram.
Instrument calibration is essential to generate repeatable and reproducible results, however it does not address all potential sources of test variance. Other parameters to monitor include specimen preparation and conditioning; environmental conditions; procedural steps; evaluation techniques, etc.

